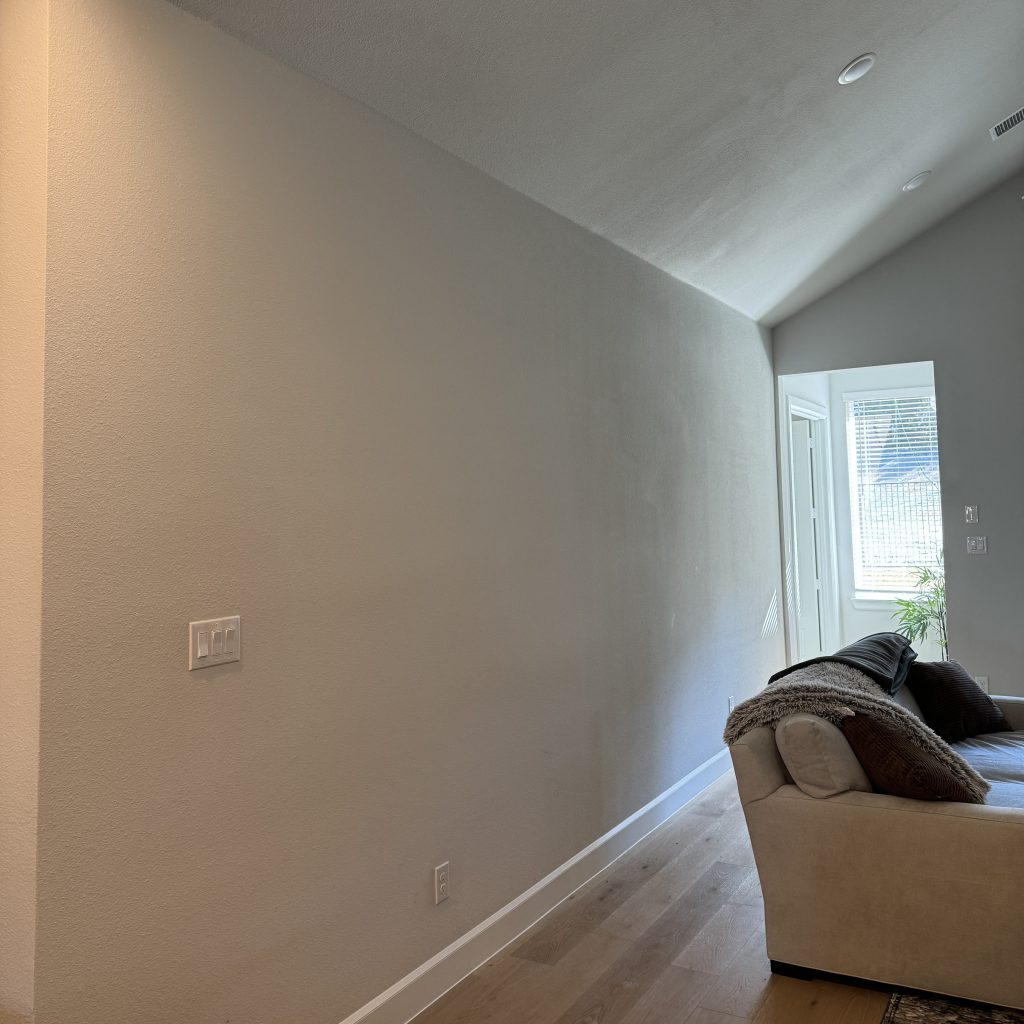
When we moved into our new construction home, this living room wall immediately bothered me.
It’s a big wall with a lot of empty space, but I didn’t want to fill it with a bunch of artwork or family photos. I felt like that would make the room look too busy, and I also didn’t want a super bold accent wall that would become the main focus of the entire space.
Then there was the practical problem: we had a baby and two dogs, and the bottom half of that giant white wall got dirty very quickly.
So this became the first real project we tackled in our new house.
We decided on a simple board and batten wall with a subtle paint color. It added just enough character to break up the huge blank wall without making the room feel smaller or becoming a distraction.
And because every home project we start somehow takes longer than we think it will, what felt like a good Christmas-break weekend project ended up taking us about eight days from start to finish.
To be fair, that’s eight days with kids, dogs, work and normal life happening around us—not eight straight days of working on a wall.
Why We Chose Board and Batten
We went back and forth on what to do with this wall because of its size.
Artwork felt like it would require a LOT of pieces to fill the space. I didn’t want a gallery wall, and I wasn’t looking for anything too bold or trendy.
Board and batten checked all the boxes.
It would:
- Add some architectural interest to a very plain new-construction wall
- Help the room feel a little more custom
- Break up the huge amount of blank wall space
- Give us a more durable painted surface along the bottom
- Add character without overwhelming the room
We decided on a square board and batten pattern because I wanted it to feel clean and simple.
Step 1: We Removed the Existing Baseboard
This is one step I see skipped in a lot of board and batten tutorials.
We removed ours.
There are absolutely ways to install board and batten without removing your existing baseboard, especially depending on the trim profile and design you’re using.
For the square pattern we wanted, though, we knew from previous projects that we preferred the cleaner look of replacing the baseboard and having all of the trim meet properly.
It is more work.
But I would do it again.
If you’re going for a really crisp, built-in look, I think this little detail makes a big difference.
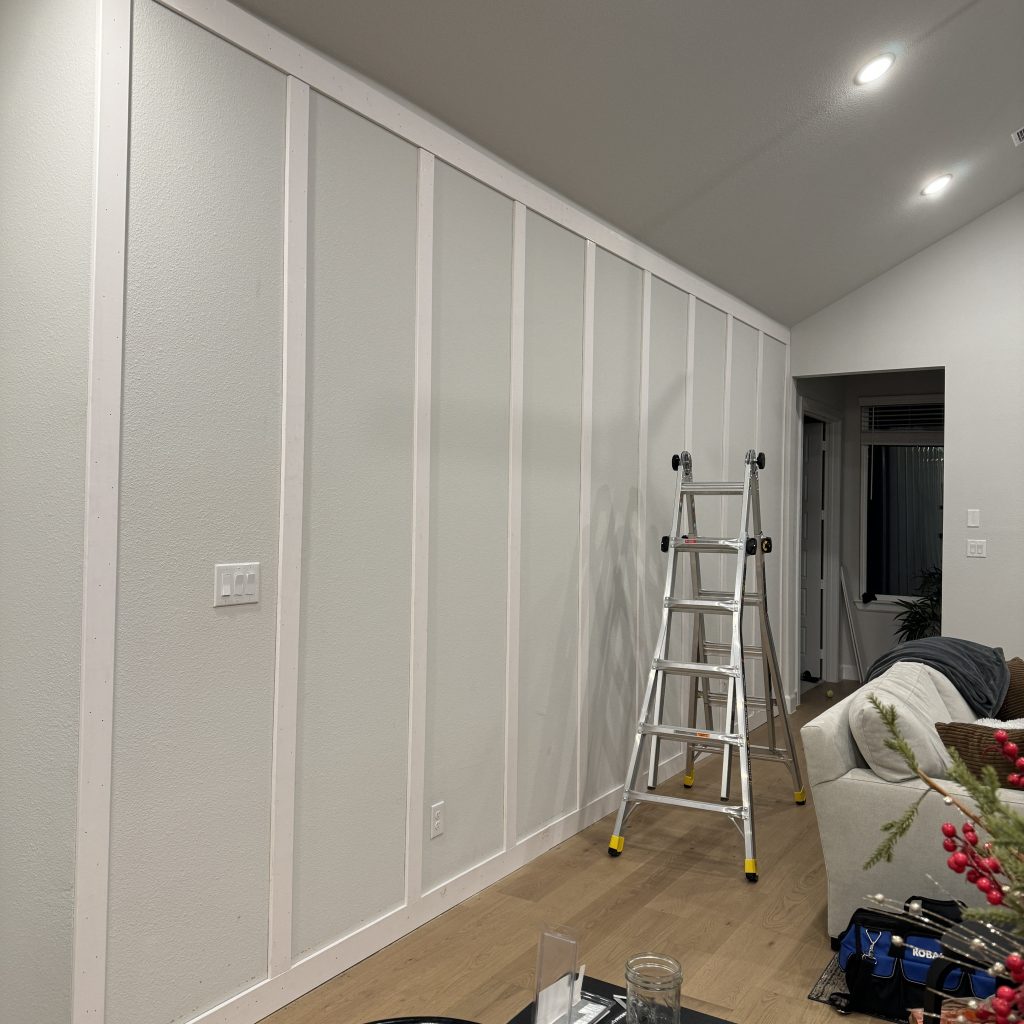
Step 2: We Framed the Wall
Once the old baseboard was removed, we started building the outer framework for the board and batten.
We installed the new baseboard and horizontal pieces first to establish the overall height and shape of the wall treatment.
Then came the vertical boards.
And this is also where we made our biggest mistake.
The tool I wish we’d bought before starting
My husband measured and leveled everything by hand.
It worked.
I would not recommend doing it that way. 😂
If we did this project again, I would buy a laser level before we even started.
When you’re installing this many boards across a large wall, you’re constantly measuring and checking your lines. A laser level would have made the process significantly faster and taken a lot of the guesswork out of getting everything straight.
It’s now firmly on my list of tools we should have bought sooner.
Step 3: We Created the Squares
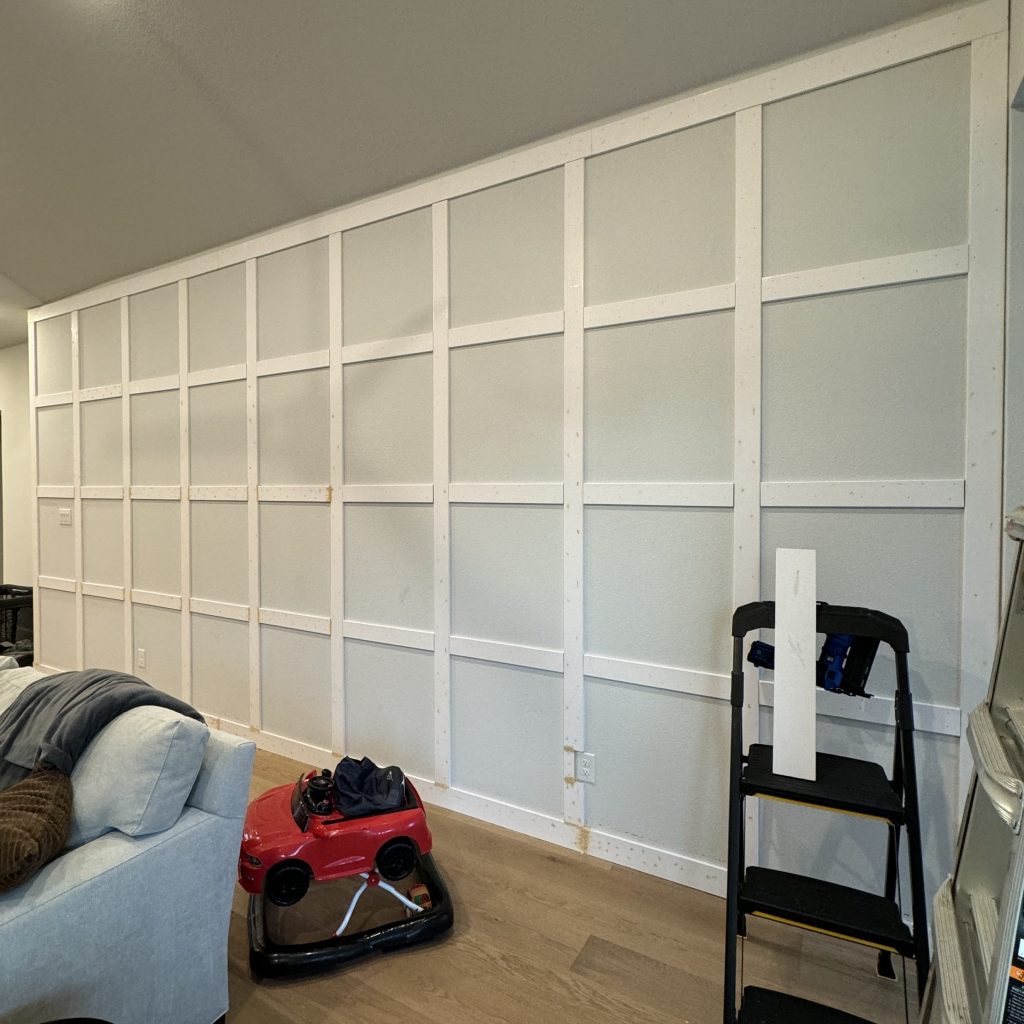
Once our vertical boards were installed, we moved on to all of the smaller horizontal pieces that create the square pattern.
Every one of those little pieces had to be individually measured and cut.
Was this tedious?
Yes.
This was probably the part of the project where our “quick Christmas break project” started feeling considerably less quick.
But individually measuring the openings gave us a better fit because walls are rarely perfectly straight and measurements can vary slightly from one section to another.
We used a miter saw to make our cuts, then attached the trim to the wall using construction adhesive and a nail gun.
Step 4: Fill, Sand…and Keep Going
Getting all the boards onto the wall feels like you’re almost finished.
You are not almost finished. 😂
The finishing work is what really makes board and batten look like it belongs on the wall instead of looking like pieces of wood you nailed to drywall.
Once everything was installed, we:
- Filled the nail holes with wood filler.
- Filled and cleaned up any imperfections.
- Sanded everything smooth.
- Caulked the appropriate seams and edges.
- Prepped the entire wall for paint.
This part isn’t particularly exciting, but don’t rush it.
The cleaner your prep work is, the better the finished wall will look.
Step 5: Choosing the Paint Color
I knew I wanted color, but I didn’t want this wall to become a huge statement wall.
The board and batten itself was already adding texture and dimension, so I wanted the paint color to be subtle enough to work with the rest of our house.
One surprisingly helpful thing we used was at Home Depot.
They had this little paint-testing setup that lets you look at paint samples under different types of light.
It looks a little strange.
It’s also a game changer.
Paint changes SO much depending on the lighting. The color you choose under bright store lighting can look completely different once you get it home and see it in natural daylight, warm evening light or your actual living-room lighting.
So instead of looking at a swatch under those super-bright store lights and calling it good, we tested it under the different lighting options before making our final choice.
I would still recommend bringing samples home and looking at them on the actual wall, but it was a really helpful first step in narrowing down the color.

How Long Did Our Board and Batten Wall Take?
About eight days total.
But that’s a very real-life eight days.
We weren’t working on it for eight hours every day. We had kids, dogs, work, Christmas break and everything else going on at the same time.
If you had uninterrupted time and all of your materials ready to go, you could obviously complete it faster.
For us, the biggest time-consuming parts were all of the individual cuts and the finishing work—filling, sanding, caulking and painting.
So if you’re planning to knock this out in one Saturday…
Maybe don’t make Sunday plans. 😂
What We’d Do Differently
The biggest thing?
Buy the laser level.
Measuring and leveling every piece by hand added unnecessary time to the project.
I also wouldn’t skip removing the baseboard for this particular design. It created more work at the beginning, but I think the finished result looks much cleaner.
And I wouldn’t rush the filling, sanding and caulking stage. That’s the least satisfying part of the project while you’re doing it, but it’s what gives you the crisp finished look at the end.
Was It Worth It?
Absolutely.
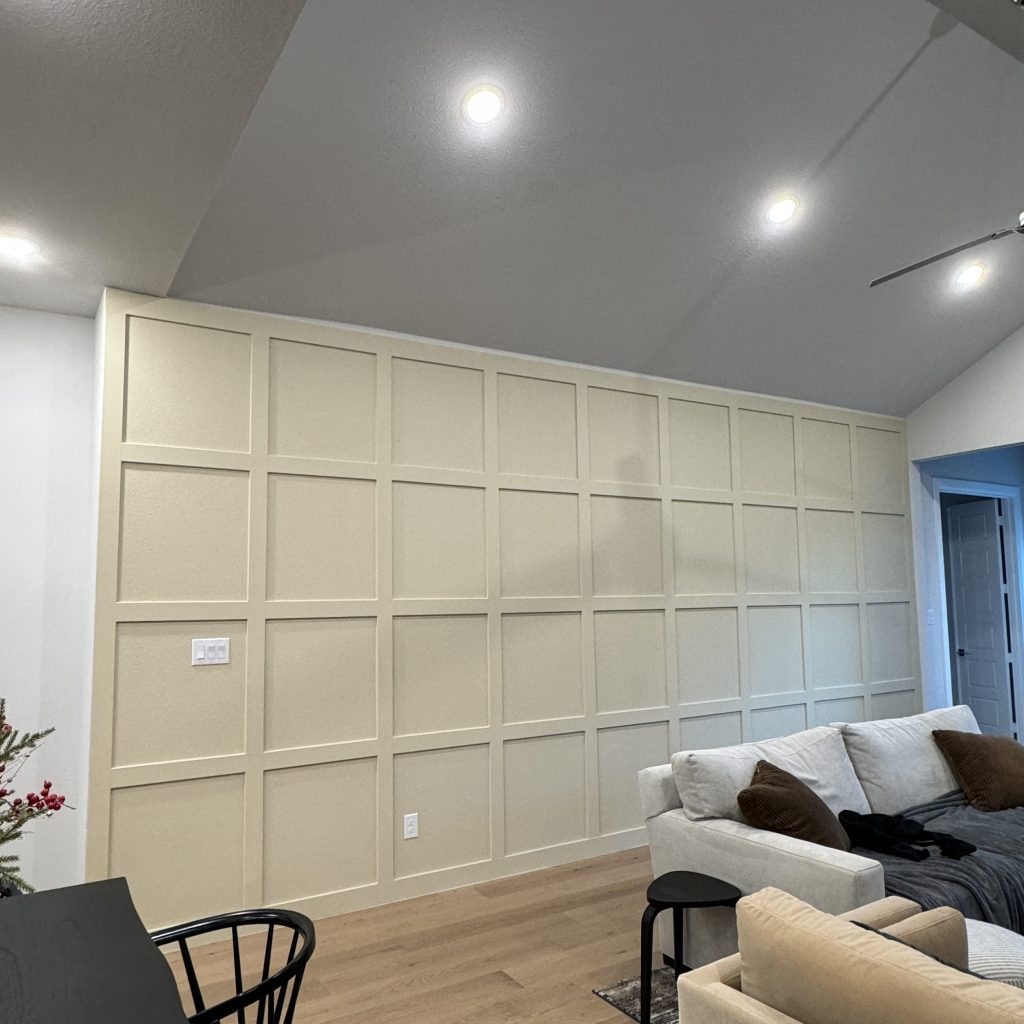
This was the first project we completed in our new construction home, and it completely changed the room without making it feel overly designed.
The wall still feels simple, but it isn’t just a giant blank builder-grade wall anymore.
That’s really what we’re trying to do throughout our house: keep what works and slowly add the details that make it feel more like us.
And considering this wall started because I was tired of looking at fingerprints and dog marks on white paint, I’d say we ended up with a pretty good upgrade.
What We Used
Materials
- Trim boards
- New baseboard
- Construction adhesive
- Brad/finish nails
- Wood filler
- Paintable caulk
- Sandpaper
- Primer
- Paint
Tools
- Miter saw
- Nail gun
- Measuring tape
- Level
- Sander/sanding block
- Caulk gun
- Paint supplies
- Laser level — the thing we wish we’d had


Leave a comment